Since I live in the US and have access to many a mechanic and can relate to my own observations I’ll use this as a base for my comments and you can adapt and or re-think how it may pertain to you where you live.
I have access to the Rotax hose change practices, information and results from several mechanics including myself which easily covers a couple hundred Rotax engine hose change procedures.
Rubber fuel hose was really not intended to push over barbed fittings as documented on several fuel hose manufacture websites. They prefer the flared or bulb end to slide the hose over. That said most of us have exactly that, barbed hose ends on many aircraft installations. What we have found is that fuel injection hose is less flexible than the standard carburetor hose. When you try to push fuel injection hose over a barbed fitting it has less give because of its pressure rating and tends to scrape the hose liner and small particles then float down stream. This is exacerbated by using a cutting tool with a serrated edge. Something like serrated edge scissors. Then add using the wrong style clamp and over tightening the clamp crushing the hose all adds to debris floating down stream towards your carburetors and a power loss when you absolutely don’t want one. So picking our hose type, tools and clamps are important ahead of time. As the old saying goes, “Failure to plan is planning to fail”.
Generally speaking, fuel injection hose has a working pressure normally around 100 psi and a burst pressure of around 900 psi. Standard carburetor fuel hose has a working pressure of 50 psi and a burst of 250 psi. The good thing with the standard carburetor hose is it has a little give in it since it isn’t as stiff and rated for the higher fuel injection pressure. This hose will slide over the flared, bulb or barbed fittings much easier and there is far less chance of scraping the inner liner and causing unwanted debris. A smooth inner liner is more preferable than a raised criss-cross pattern on the inside of some fuel injected hose which is caused by the thread re-enforcement of the hose. This tends to scrape more with a barbed fitting. I know everyone remembers that our normal 912 fuel system operating pressure is up to 2.2 to 5.8 psi for the 912UL or ULS engine. So let’s just say the upward limit is 6 psi to round it off. So using the standard carburetor hose works just fine with plenty a pressure safety margin.
Now who’s brand to use? Well that is up to you and where you live in the world. For me and many of my mechanic friends we have been using Gates Barricade Greenshield technology standard carburetor hose. It has 4 liners and is rated for any fuel and even 100% alcohol.

That should pretty much cover anything we will put in our 912 engine. We have not had any issues with scraping inside lining or hose degradation. The other big issue here is to use the proper cutting tool. I used to manufacture dive compressors and used 200’K of hose a year and needed perfectly smooth cuts. I use a Sears Craftsman Utility cutter Craftsman 3-7/8 in. Handi-Cut, item #00937301000, Mfr. model #37301.
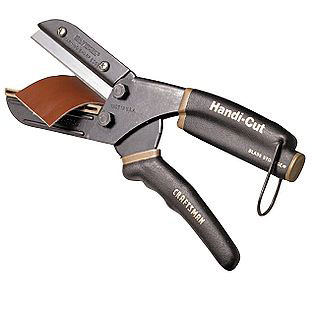
http://www.sears.com/shc/s/p_10153_12605_00937301000P?mv=rr
It has a 3 7/8” long straight and scalpel sharp edge. It leaves a perfectly smooth cut and will handle any hose on a 912 engine. Serrated edge cutters will leave very tiny particles on a cut edge which gets shoved into the hose line when pushed over a fitting.
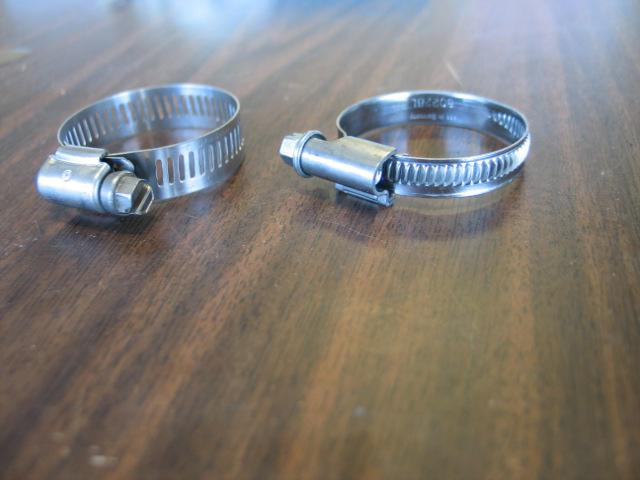
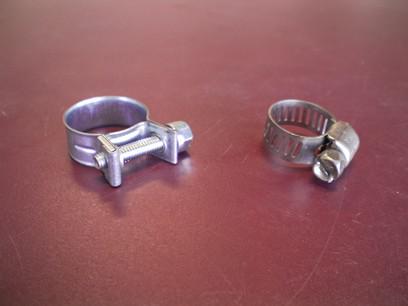
Hose clamps. I’m sure everything gets used here. You really should not use the standard hose clamp with the serrated openings like you buy in a hardware store. Yes they do get used, yes they have been around a long time, but they don’t give a good solid 360 degree seal, they can be over tightened and easily stripped and they cut into the outside of the hose. If you absolutely want to use a screw type clamp then use a fuel injection clamp. It doesn’t cut into the hose, you can’t strip it and it does a better job with a 360 degree seal. If you have to use a screw clamp then the one in the picture below with the raised ribs is a better choice and doesn’t over cam and strip and won’t cut into the hose. These clamps are better for coolant hose and not fuel. The next picture shows a fuel injection clamp (on the left) verses the standard hardware store clamp. Fuel injection clamps are good for oil hose and if you don’t have access to good Oetiker clamps then it’s a good second choice for fuel.
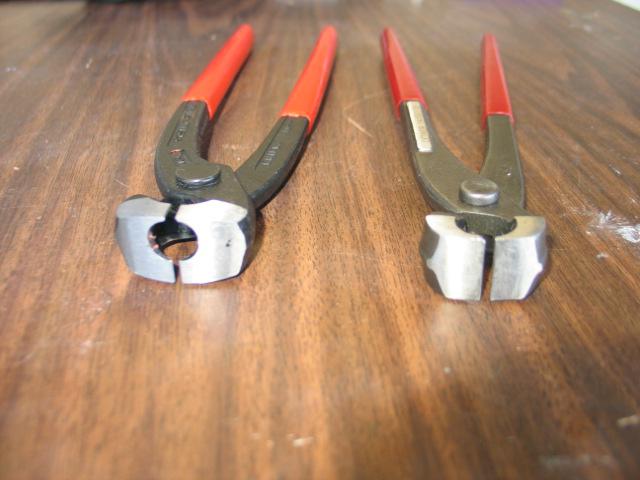
The better way to go and is preferable as an industry standard is something like an Oetiker band clamp. (Pictured below) I personally use a stainless steel one ear stepless Oetiker clamp on all fuel hose applications. They come in all sizes from the very tiny to the very large. It slides over the hose and you use a set of pinch pliers to squeeze it shut. I know then it won’t rust, it can’t come loose and provides an excellent 360 degree seal. One note for this clamp is to use the correct size and don’t use too small a clamp and crush it to death especially over a barbed fitting.
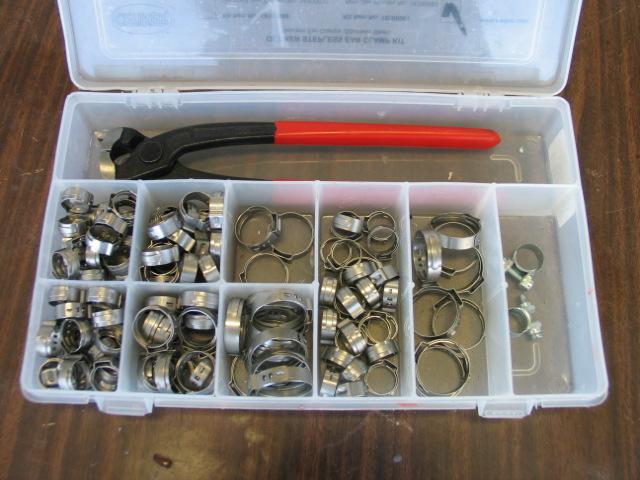
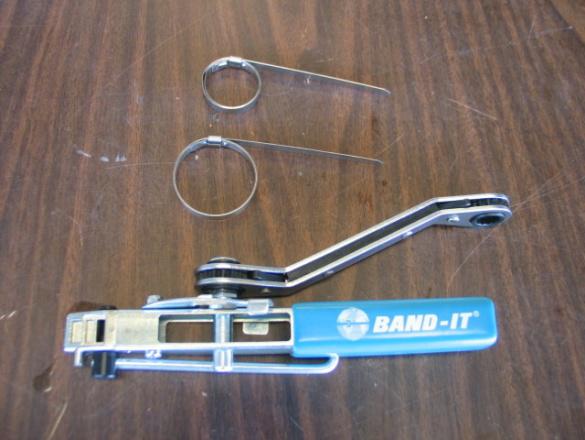
Now we should also mention that all your fuel and oil lines should be in fire sleeve. The best and industry standard is to use Band-It style clamps to secure the fire sleeve ends. These look like a little noose that gets pulled and cinched down to secure the fire sleeve. These can apply tremendous torque so only barely snug these down on any hose. If you over tighten these they will close off the hose underneath and restrict its flow. These clamps are already on the fire sleeve on the fuel pump from Rotax. The best way to remove these clamps and Oetiker clamps is with a Dremel tool and a re-enforced cut off wheel. You can use the Oetiker pinch pliers to remove these too.
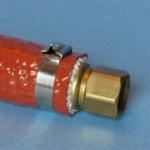
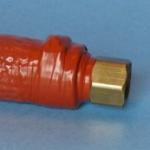
There is one last item to cover. We are supposed to seal the ends of the fire sleeve with something to keep fuel, oil or any liquid from wicking up into the fibers of the fire sleeve at its ends. You can use a couple of different methods. Some use the red silicone RTV and thin it slightly with a little toluene and brush it into the end and fibers of the fire sleeve. Some use a product called “End Dip” which comes in a quart can for $185-$225. You dip the fire sleeve ends and let it dry. I hate to sit and wait so there is one more good option. You can use fire sleeve self vulcanizing tape that is fire rated like the fire sleeve.
(photo credit: www.abthermal.com)
You as an owner can do one last safety check. After the hose has been installed and the engine is run and the carburetors synced you can run the engine for another 20-30 minutes on the ground at 3500-4000 rpm. Then head back to the hangar and pull the carburetor bowls off and look for any debris that may have escaped your careful planning and installation. It’s just a good safety check before your first flight and should help you cover all your bases in looking for any leaks and debris before your first flight.
So here we are at the end. The whole idea of this two part article is to make you think about keeping yourself and your passenger safe with a good solid maintenance practice and not being the test subject for hose time limits. Don’t worry there will still be the ones who, ”Won’t fix it until it breaks” that we can read about in the news with the off field landing or expensive engine tear down from a damaged engine. Hopefully you will look at a Rotax 5 year rubber change with a positive attitude and plan to think about what hose, tools and clamps you want to use and not use.
Everyone Fly Safe and Often!
